mothur AMI
We get asked a lot of questions by mothur users. Perhaps the one I hate the most is, “What type of computer should I get?” I hate this question because I don’t want to spend other people’s money and because I honestly don’t have the answer. I used to encourage people to get the biggest, baddest computer they could afford. I’ve followed this advice myself.
Over the years, we have literally spent upwards of $50,000 on a high
performance computer cluster with a ton of processors, RAM, and storage.
Then the System Administrator told us that we were really only using 10%
of the cluster’s capacity. In other words, we were effectively spending
$50,000 to get $5,000 worth of service. I’ve come to realize that you
can do amazing and very affordable bioinformatics on a pretty crappy
computer. Just to make the point clear, I’ve run mothur using my
iPhone. The caveat, of course, is that you are able to log into a remote
high performance computer cluster. Many institutions have high
performance computing clusters (HPCCs) that they make very cheap for
their constituents. Not everyone is so fortunate. For this latter group
of researchers, there is the Amazon Web Server (AWS). Although this
tends to be a bit more expensive than institutional HPCCs, it is a very
powerful and well-supported option.
Think of AWS as your computer, but it’s off in the ether - the cloud. You can trick it out with all sorts of applications and settings. Think yours is pretty cool? Well, you can take a snapshot of that computer and then make it available for others to use. This is what is called an Amazon Machine Image (AMI). This has the potential to be a very powerful tool for reproducibility. Think of it - you use AWS to do your analysis. Once your analysis is done, you want to make those files and your code available to others. You can make an AMI of the final product and then share the name of the AMI in your manuscript. I could then take that AMI and add data or add an analysis to supplement yours. But we’re getting ahead of ourselves. I’ve done step one - creating an AMI that is tricked out for mothur users that you can build upon for your own use.
Getting set up
You will first need to log into the AWS.
1. Go to https://aws.amazon.com
2. Click “Sign In to the Console”
3. Either Sign In using your existing Amazon account or create a new account
4. Click on the icon in the upper left corner of the page that says “EC2”
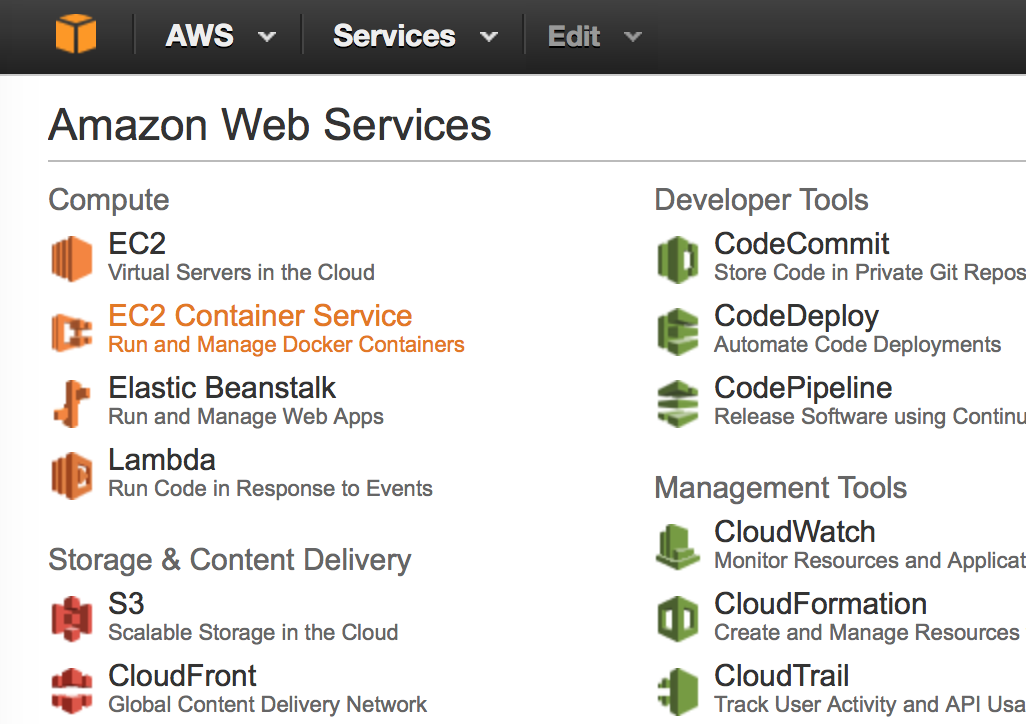
As you will have noticed, there are many options for where you could have gone. EC2 is the expandable cloud service that AWS offers. They have many many different options that are a bit overwhelming. For most of what you are doing, EC2 should suffice. You might eventually want to learn about S3 for long term data storage, but for now, we’re good.
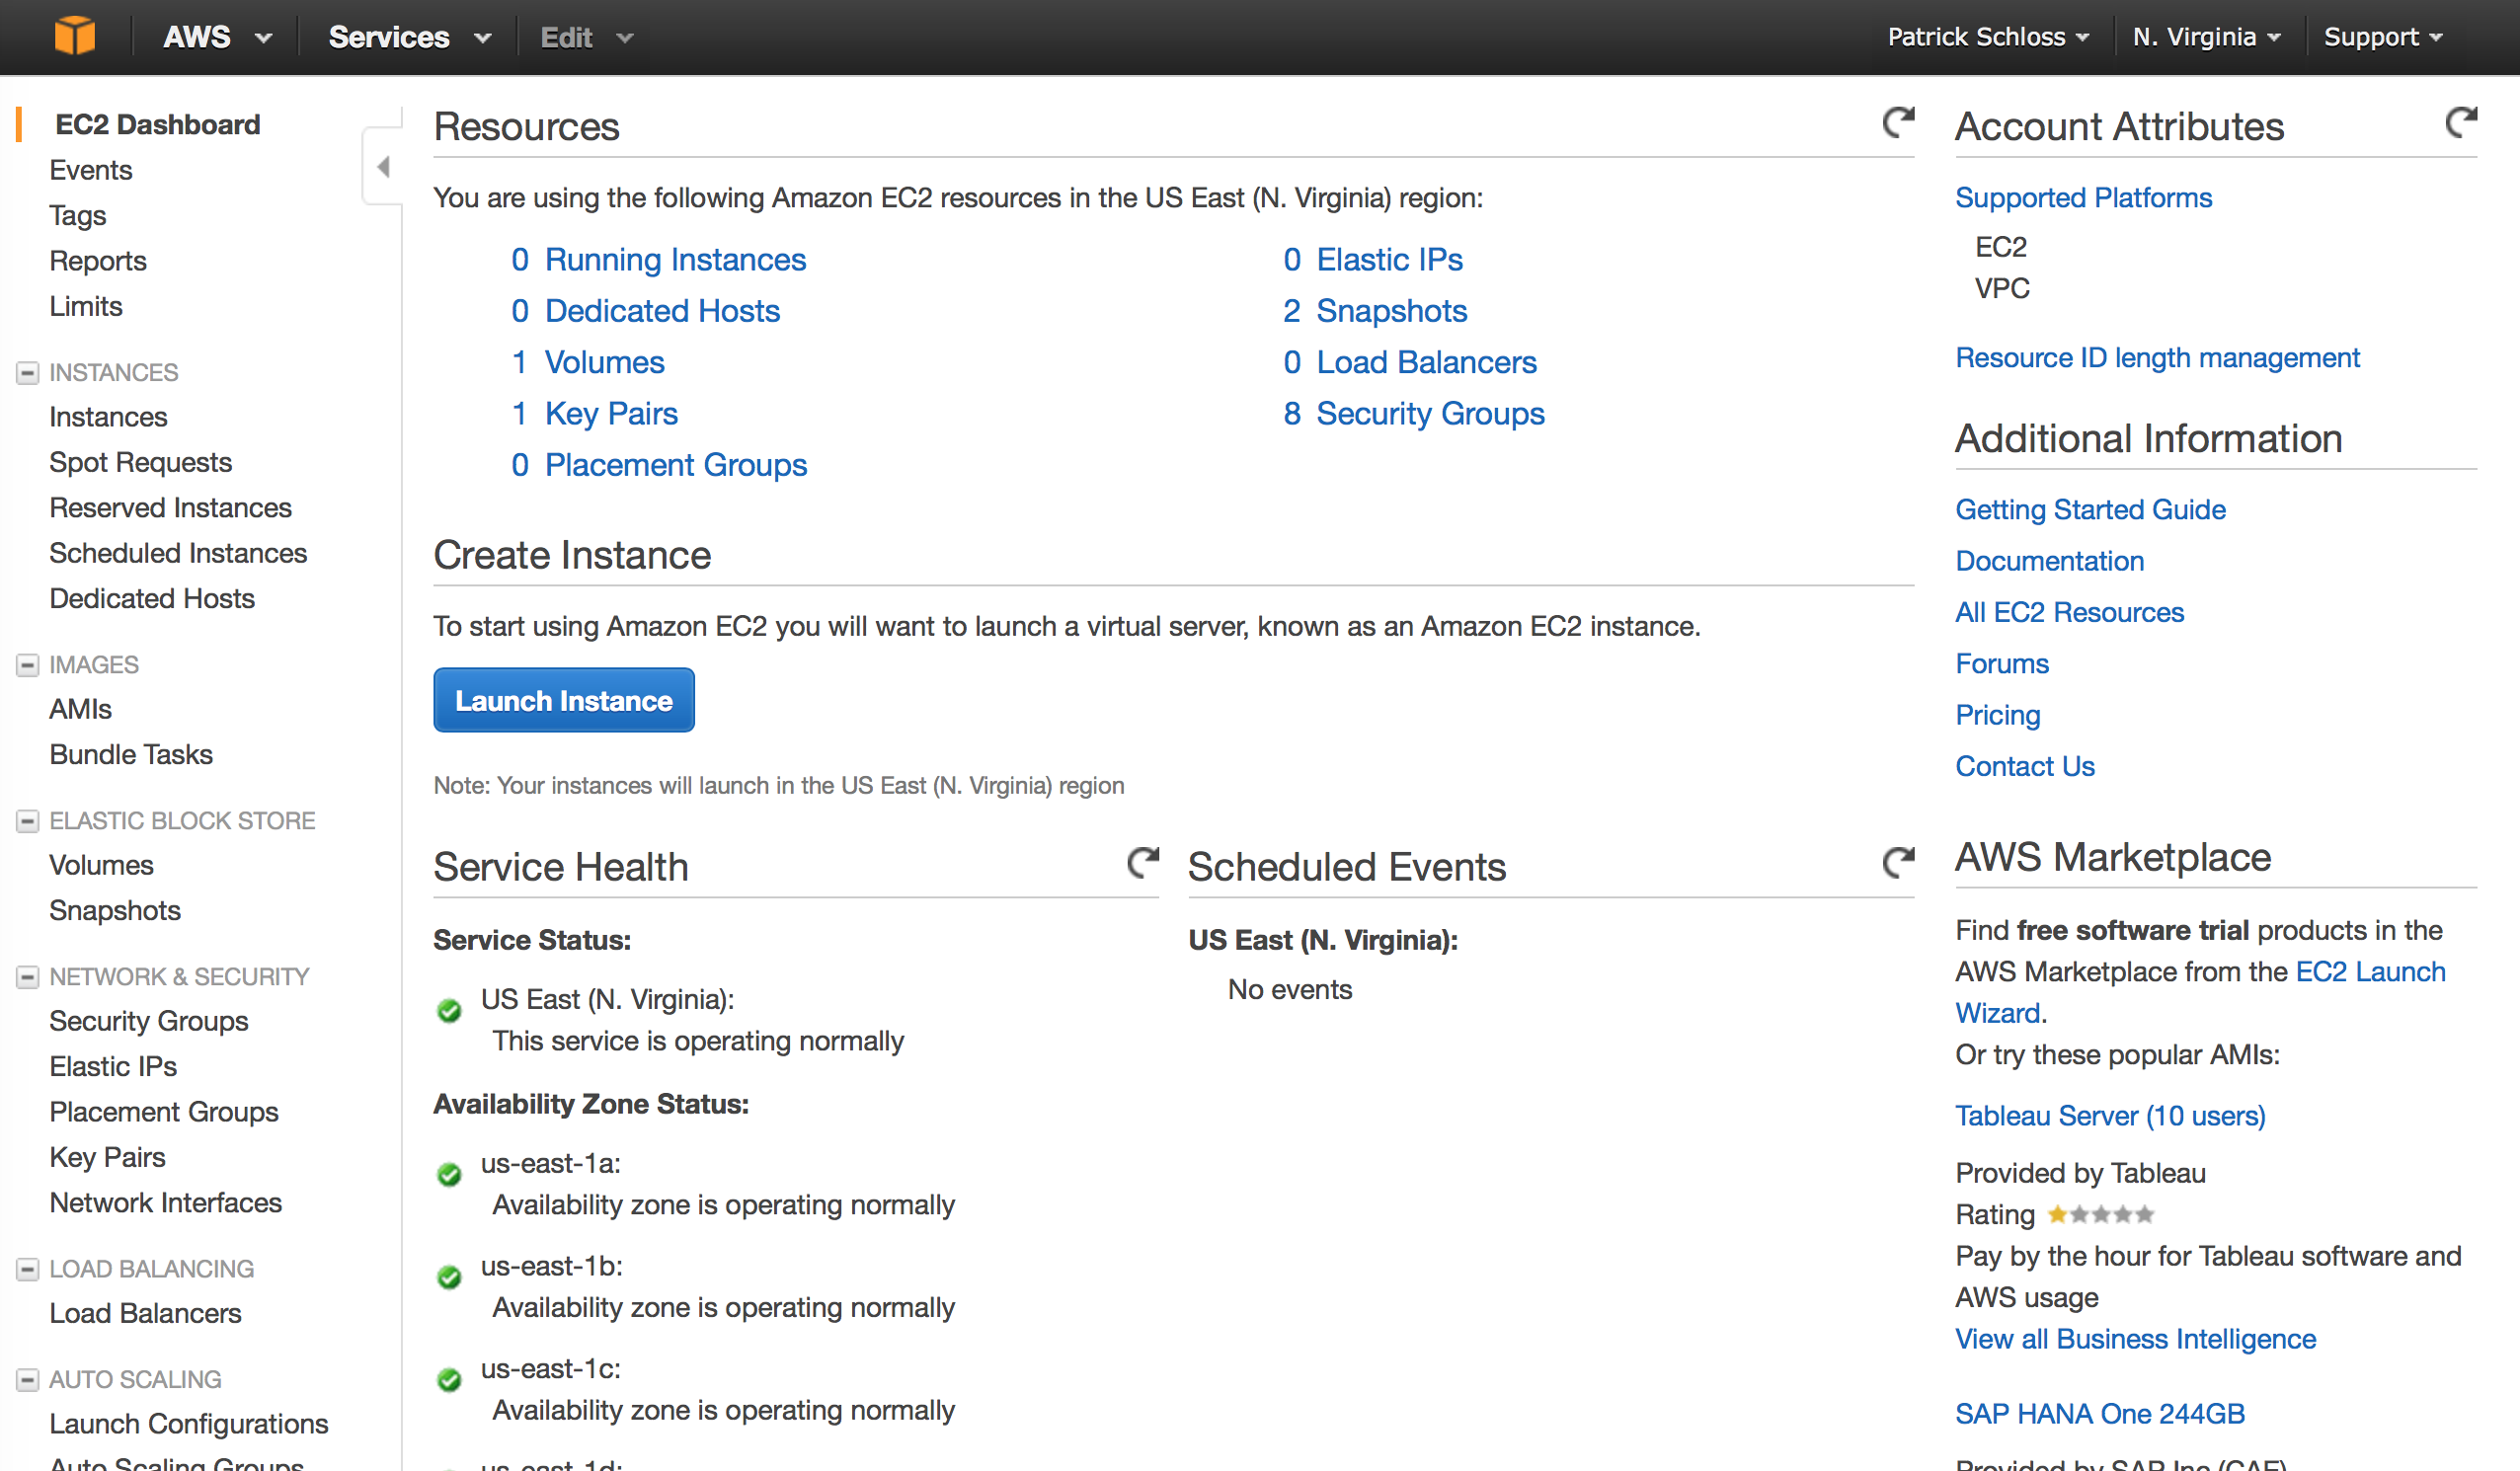
Creating an instance
At this point you will see a dashboard that tells you what resources you are using. If you’ve never logged in before, you’ll have a bunch of zeroes on this page. You’ll notice that I already have some things stored here because I’ve used this service before.
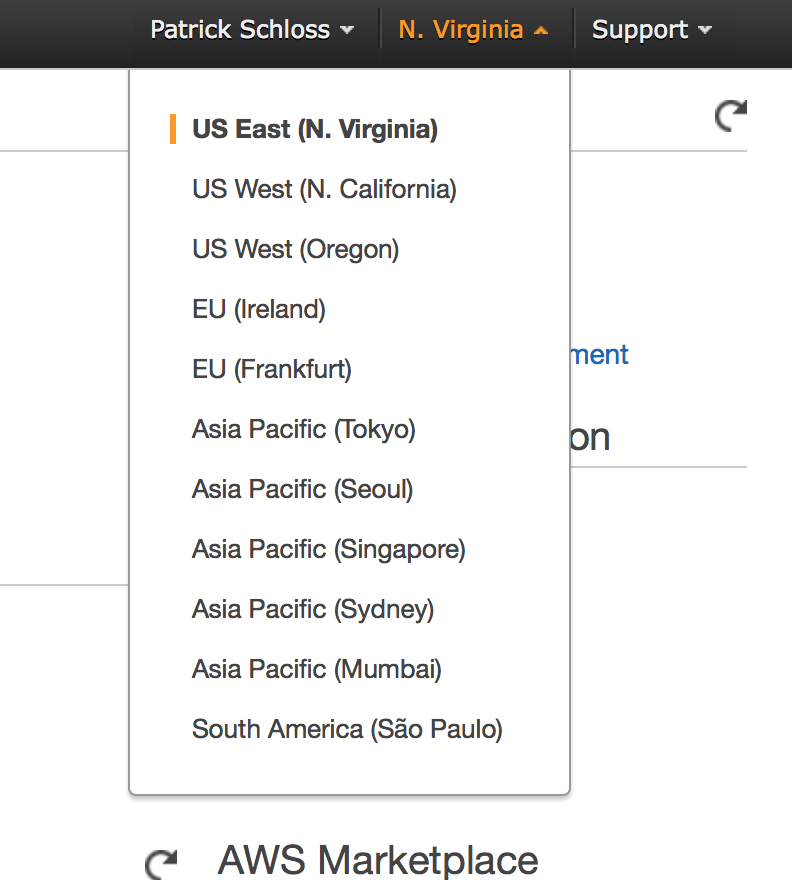
1. In the upper right corner of the screen you should see your name, next to that is the region that your computer will be living in. If it isn’t already set to “N. Virginia” click on the region that is there and change it.
2. Click on the blue button in the middle of the dashboard screen that says “Launch Instance.” This will now take you to a series of screens that I will walk you through for setting up your instance.
3. Along the left side click on the tab that says “Community AMIs”
4. In the search bar that says “Search Community AMIs”, type “mothur”
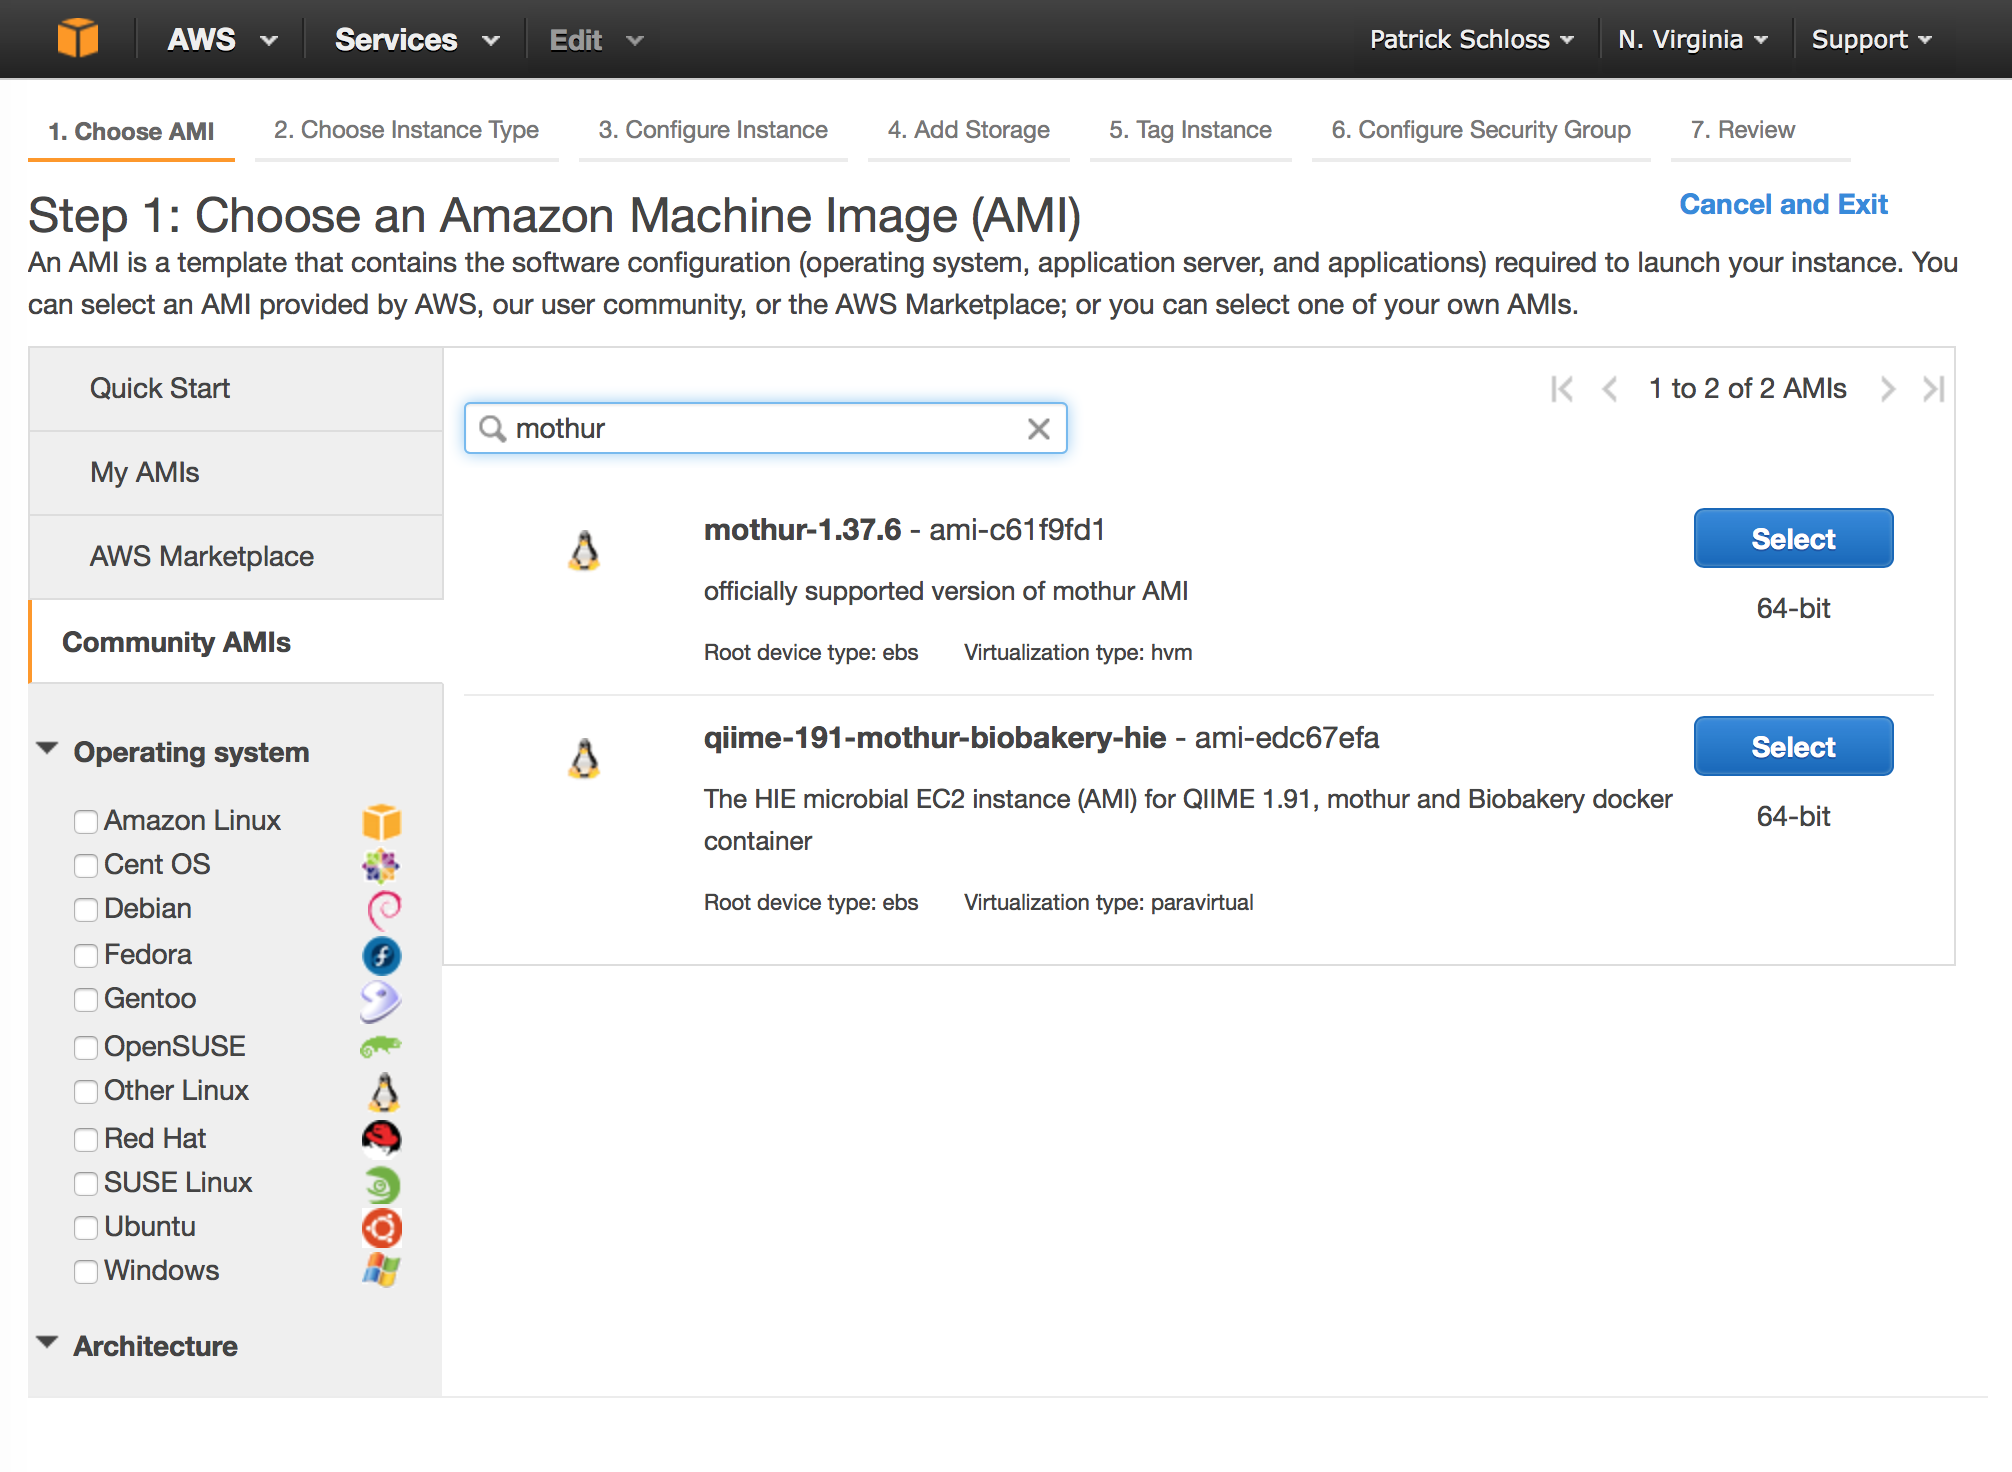
5. Click the blue “Select” button to the right of the latest version of the mothur AMI. These will be named using “mothur” and the version number.
6. Now we need to decide what type of hardware we want to run our jobs
on. For demonstration purposes, let’s pick the m3.large type.
This will give you a computer with two processors and 7.5 Gb of RAM.
If you later decide that this is too big or not big enough, you can
change the size of the
instance.
If you’re concerned about costs, AWS provides a listing of the
cost for different sized
instances. Our m3.large
instance will cost $0.133 per hour. Peanuts. Of course, the cost
will fluctuate with the number of processors and the amount of RAM.
7. Click “Next: Configure Instance Details” in the lower right corner
8. Click “Next: Add Storage” in the lower right corner
9. Again, we’ll leave the defaults, but you should notice that we are going to request 10 GB of hard drive space. There are numerous storage options, but for the purposes of this tutorial, 10 GB will suffice. Click “Next: Tag Instance” in the lower right corner.
10. You will see a “Key” and “Value” field on the screen. Under the name “Key” type “name” and under “Value” type “mothur”. This will be the name of our instance. Click “Next: Configure Security Group” in the lower right corner.
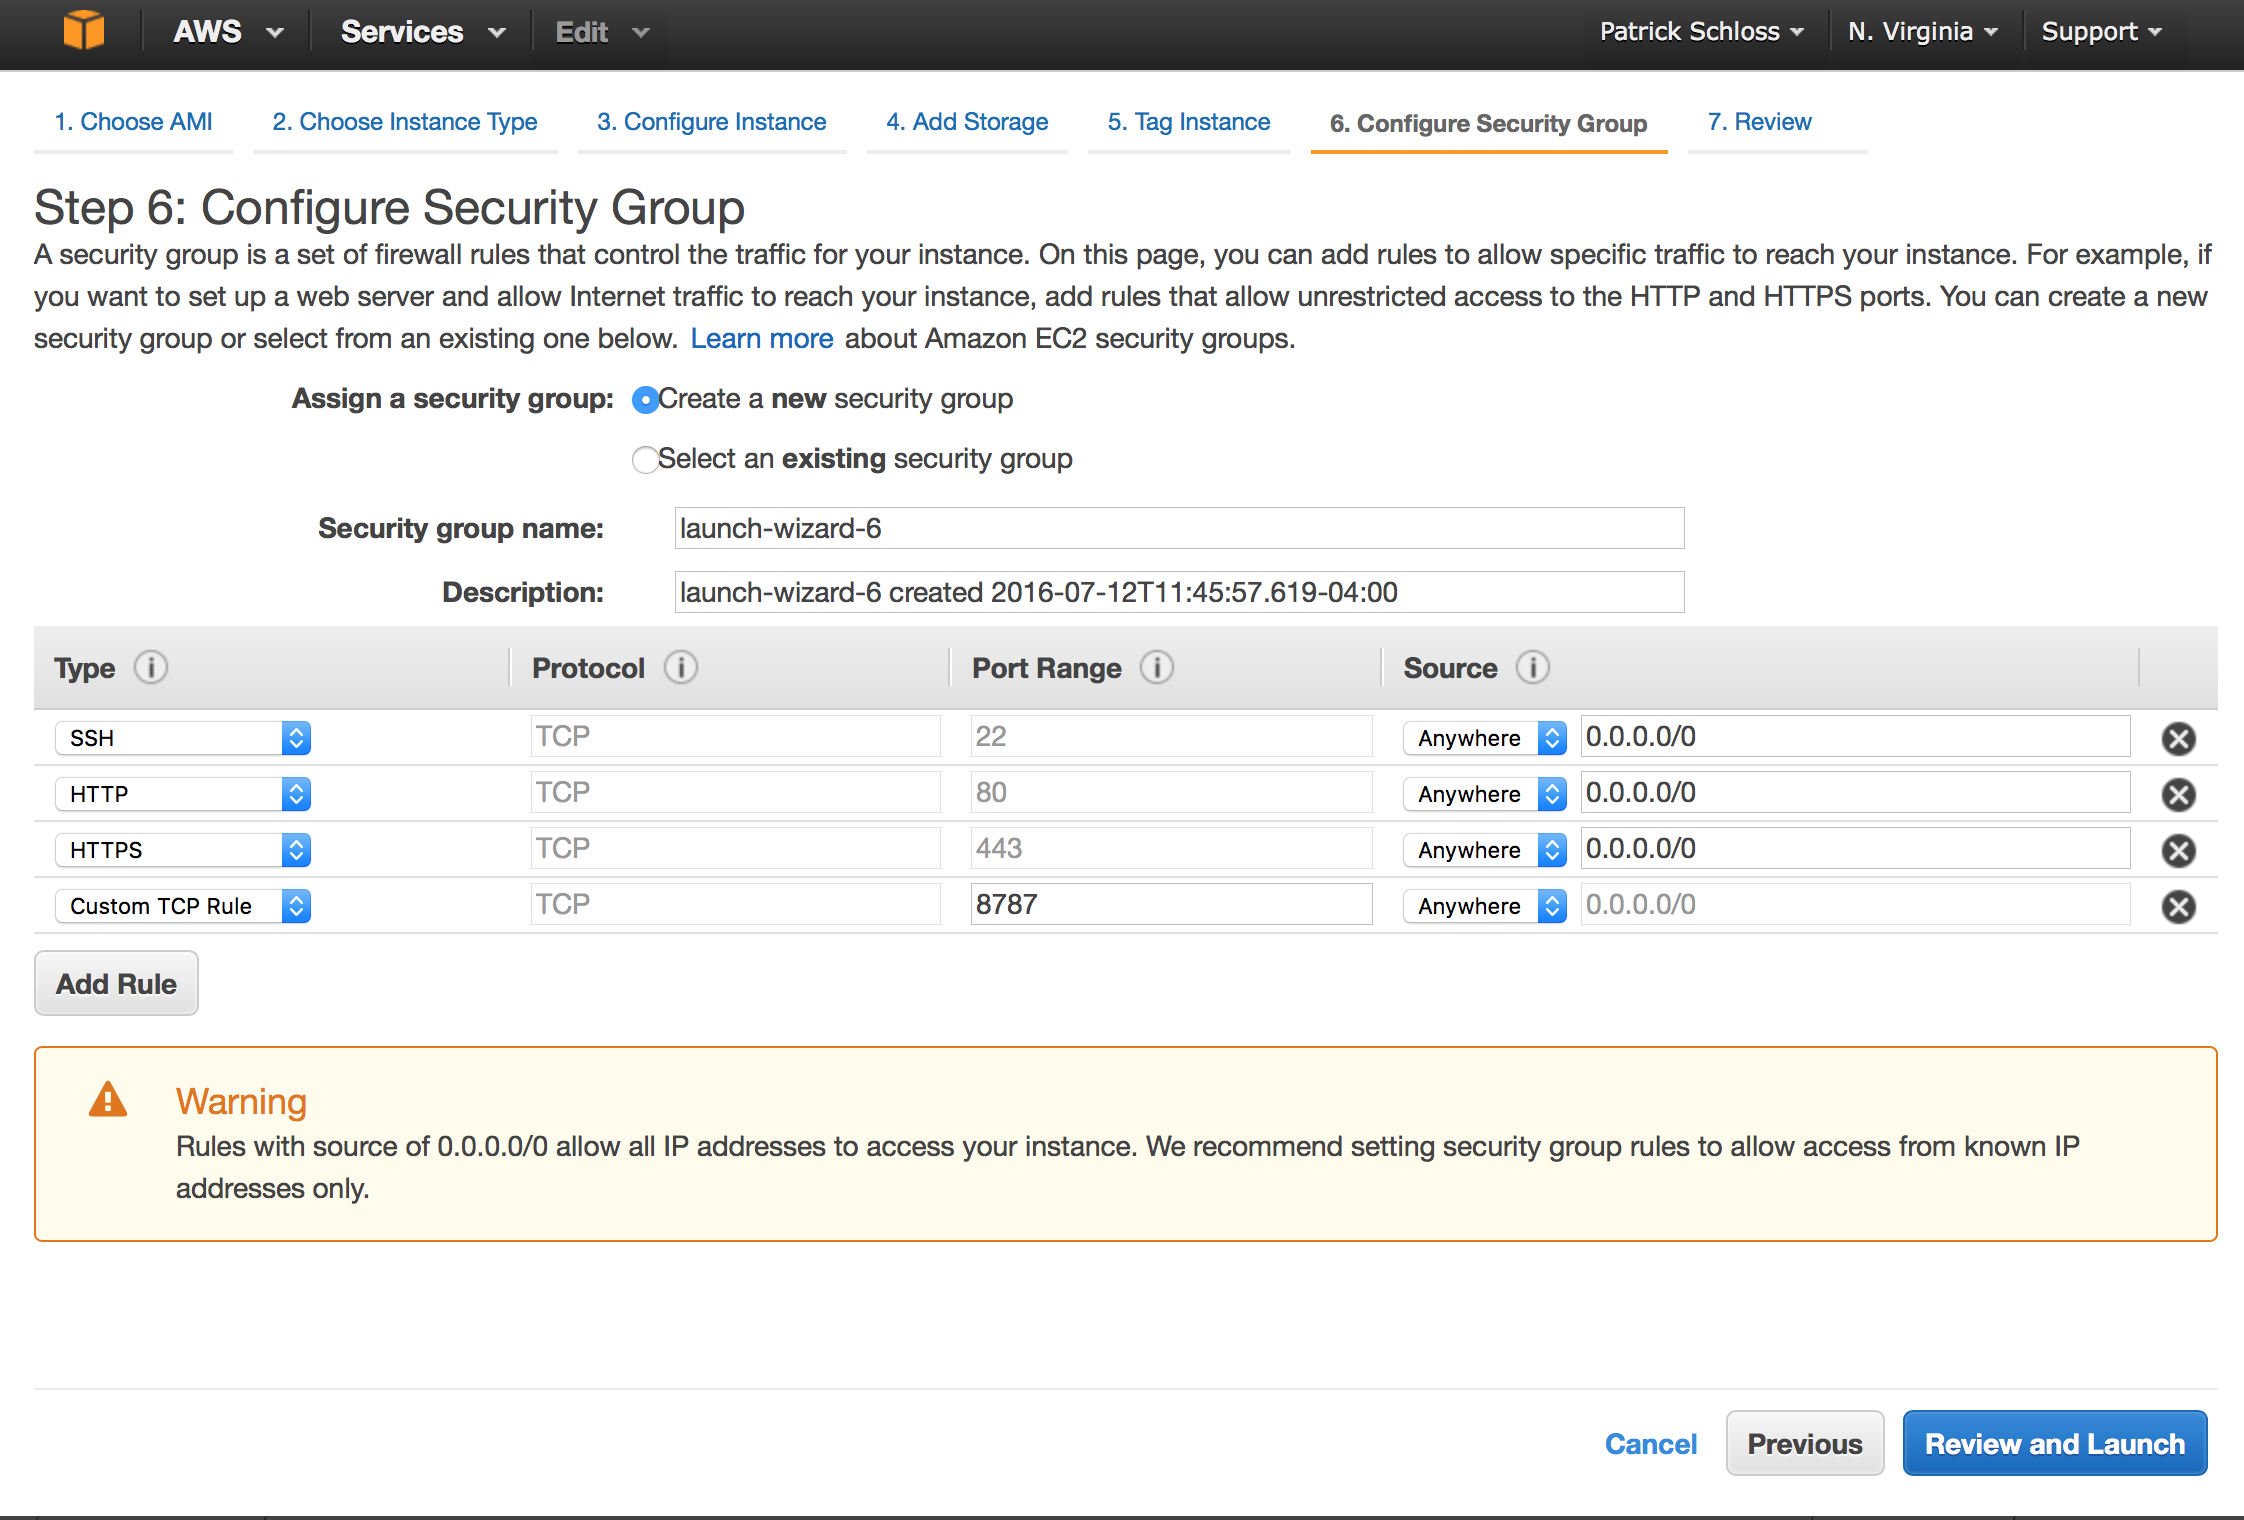
11. Click “Add Rule” and change “Custom TCP Rule” to HTTP.
12. Click “Add Rule” and change “Custom TCP Rule” to HTTPs.
13. Click “Add Rule” and leave “Custom TCP Rule”, but change the value of “Port Range” to “8787” and change the “Custom” setting from “Custom” to “Anywhere”. Alternatively, you could change it to “My IP” for added security. Your screen should now look like this:
14. Click the blue “Review and Launch” button in the lower right corner.
15. Click the blue “Launch” button in the lower right corner.
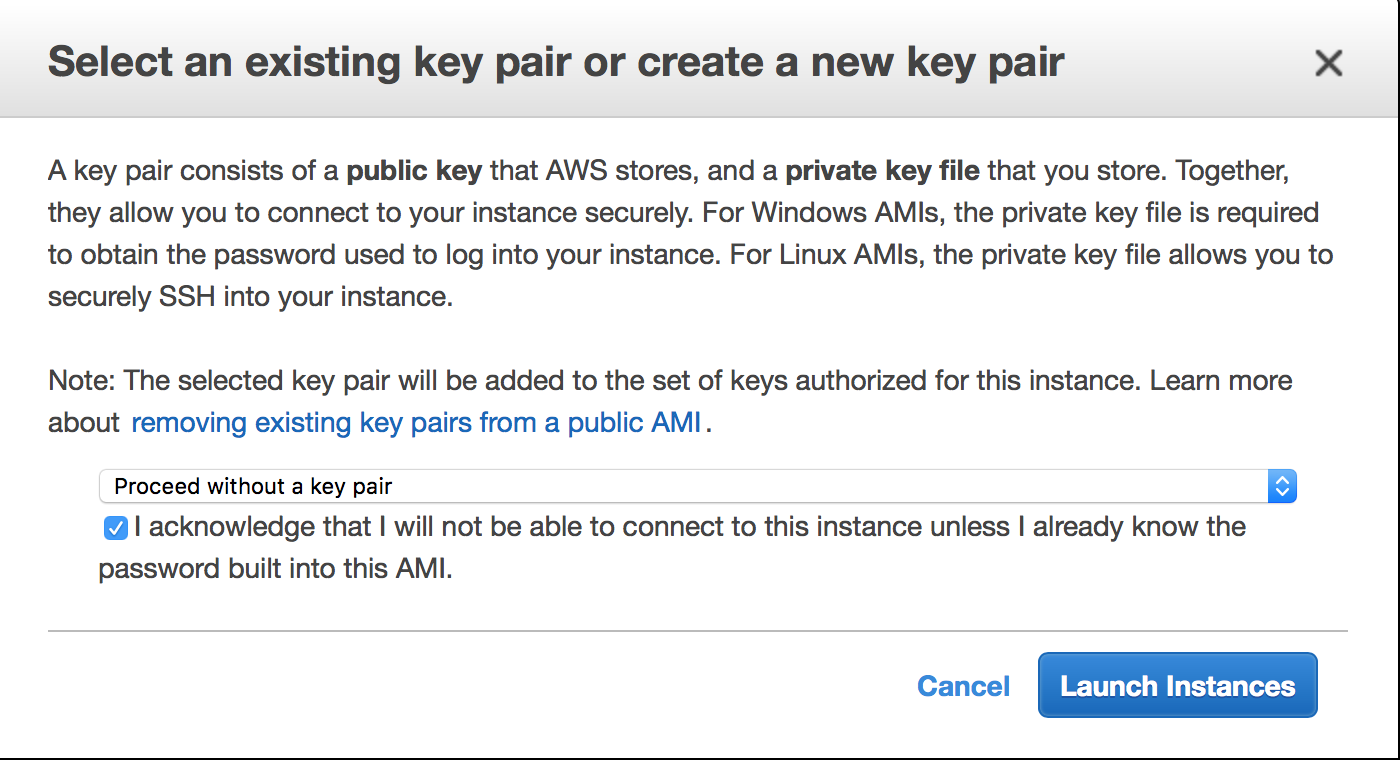
16. You will get a pop up window. If this is your first time through, you will want to change the first drop down menu to “Proceed without a key pair” and check the box.
17. Click the blue “Launch Instances” box. This will take you to a screen that looks like this:
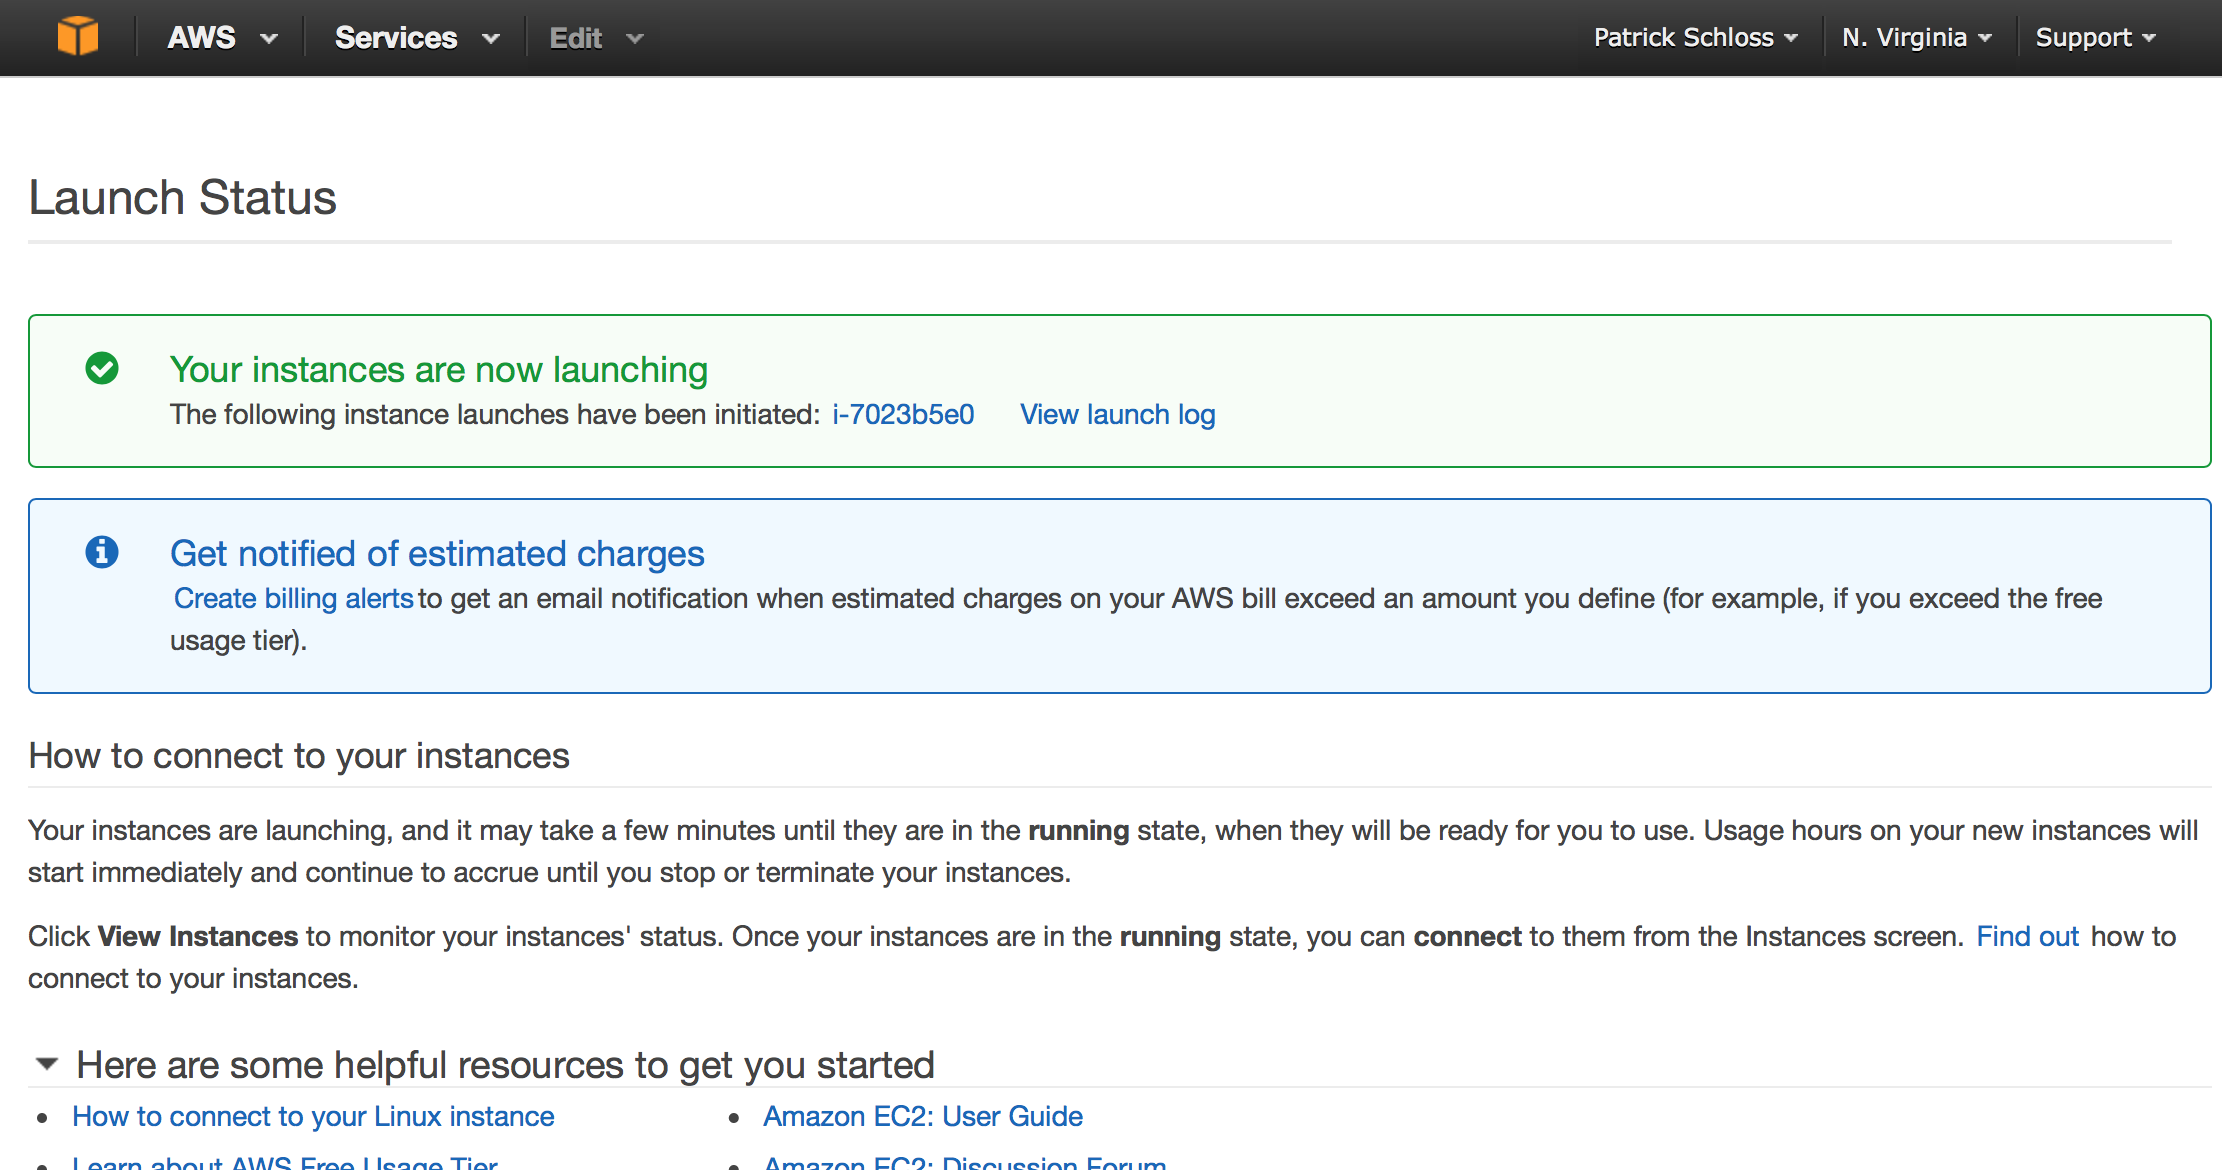
18. Click on the link to the right of where it says “The following instance launches have been initiated:”. In my example it says “i-7023b5e0”. This will take you to a display of your instances.
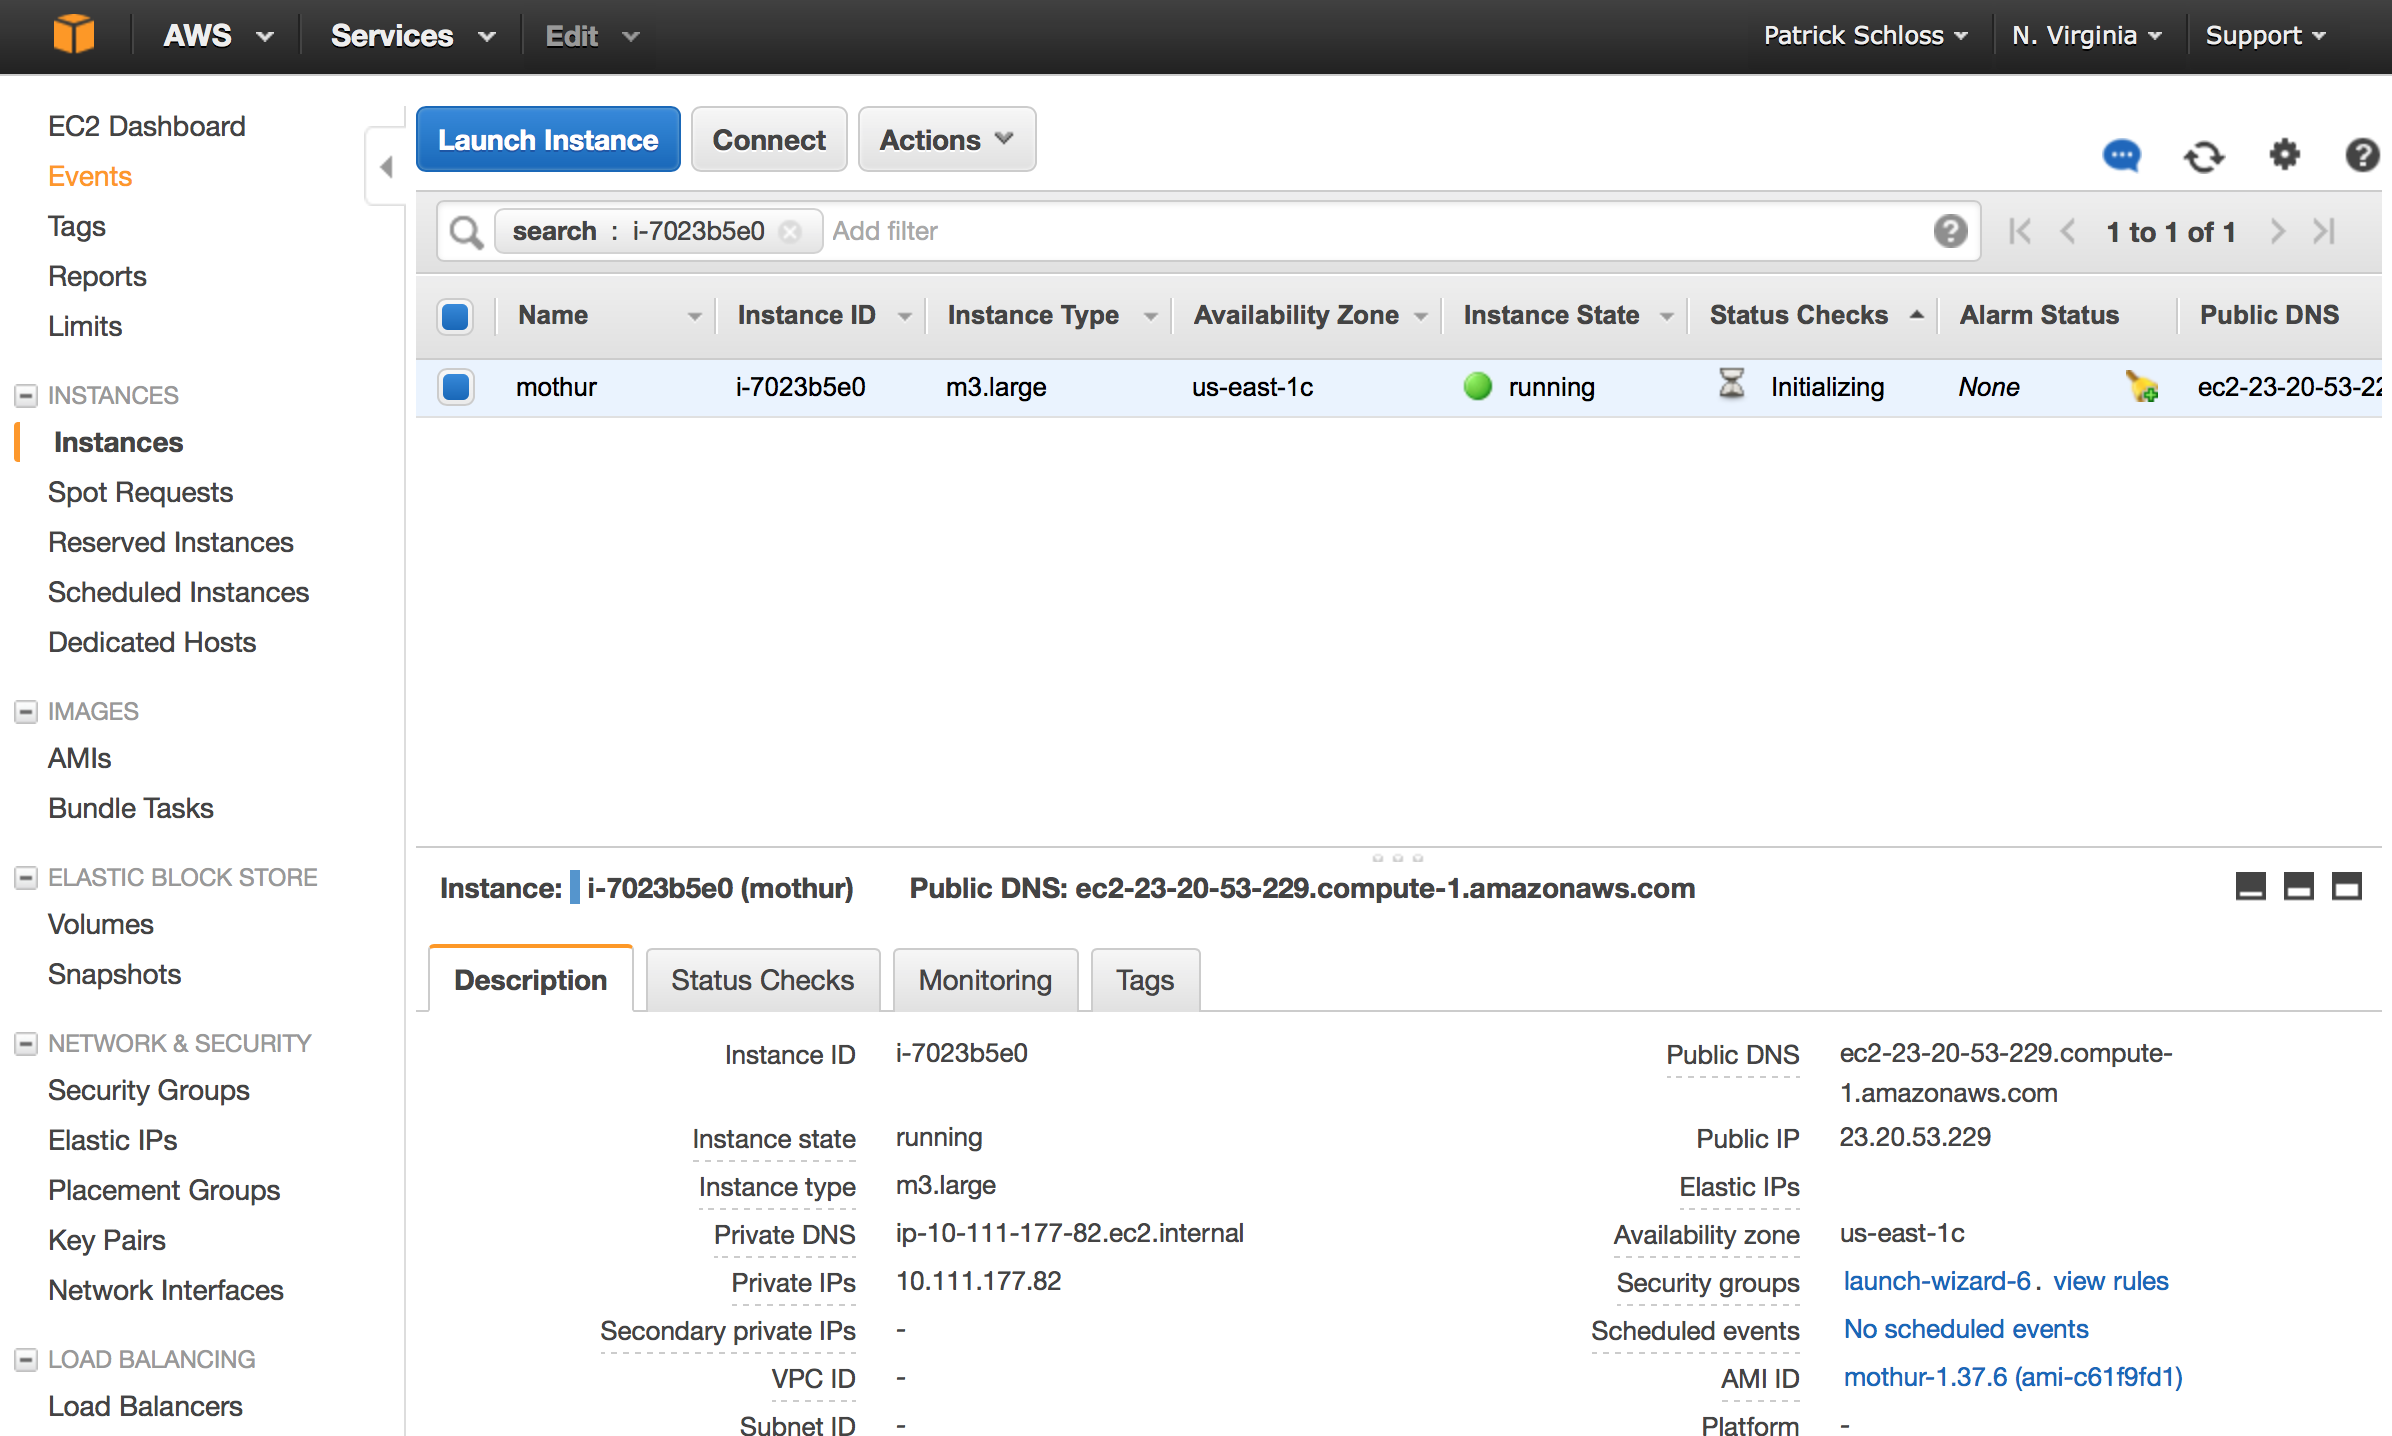
19. Congrats! You have an instance up and running. In other words, you have a brand new shiny computer. Now we need to figure out how to connect to it.
Connecting to your instance from the command line
You can connnect to your instance using a program called “ssh” from the command line on a computer running Mac OSX or linux or PUTTY on a computer running Windows.
1. Note the value to the right of the “Public DNS” header in the lower half of the screen. For my example, you’ll see “ec2-23-20-53-229.compute-1.amazonaws.com”.
2. Now we want to ssh into the instance using the mothur user id and
password, which is also mothur.
ssh mothur@ec2-23-20-53-229.compute-1.amazonaws.com
3. It might say something like...
 The authenticity of host 'ec2-23-20-53-229.compute-1.amazonaws.com (23.20.53.229)' can't be established.
 ECDSA key fingerprint is SHA256:PhY3S/GKywzhrwNTr9zsxEZ//O1UFYzqfKCVwC4upx0.
 Are you sure you want to continue connecting (yes/no)? yes
4. Go ahead and type yes and hit enter.
5. When it asks for your password, enter mothur.
6. Wonderful - you’re connected! Let’s test it out a bit by entering
ls from the command line
 mothur@ip-10-111-177-82:~$ ls
 code  data  R
7. This AMI has been set up so that there are a number of reference
files in your data/references directory. Also, the MiSeq
SOP files are stored in the data/raw directory.
If you would like to use this with your own data (and I hope you do!),
you will want to replace the files in data/raw with your own. Perhaps
most importantly, mothur is in the PATH. This means you can type
mothur at the command prompt and it will launch.
mothur@ip-10-111-177-82:~$ mothur
8. To get started with the SOP or your analysis, you will want to use
the paths to tell mothur where your files are. For example, to run
make.contigs you would run:
 mothur > make.file(type=gz, inputdir=data/raw, outputdir=data/raw)
 mothur > system(mv data/raw/fileList.paired.file data/raw/stability.files)
 mothur > make.contigs(file=stability.files, outputdir=data/mothur, processors=2)
 mothur > screen.seqs(fasta=stability.trim.contigs.fasta, group=stability.contigs.groups, maxambig=0, maxlength=275)
 etc...
Connecting to RStudio on your instance from a browser
Now you’ve run through your sequence processing with mothur and would like to do some awesomesauce analysis with RStudio. We can do that.
1. Point your browser to
ec2-23-20-53-229.compute-1.amazonaws.com:8787 making sure to
substitute your DNS address for mine and add :8787 to the end.
2. Enter “mothur” for both the username and password
3. Viola! RStudio!
Moving files in and out of your instance
Before you move anything, you probably want to make sure that you have
compressed your files as much as possible to reduce the amount of time
required to transfer the files. For example, you could bundle the entire
data directory by running tar cvzf data.tar.gz data/, which will
produce data.tar.gz or an individual file by doing
gzip data/mothur/stability.trim.contigs.fasta, which will produce
data/mothur/stability.trim.contigs.fasta.gz. You can uncompress these
by doing tar xvzf data.tar.gz and
gunzip data/mothur/stability.trim.contigs.fasta.gz. Ok, back to
transferring files...
Moving files to local computer
To move files from the instance to your local computer I will do something like this:
scp mothur@ec2-23-20-53-229.compute-1.amazonaws.com:data.tar.gz ./
This will download data.tar.gz to my current directory (i.e. ./) on my computer.
Moving files to instance
To move files to the instance from my local computer I will do something like this:
scp fastq.tar mothur@ec2-23-20-53-229.compute-1.amazonaws.com:data/raw
This will upload an archive from my local computer (i.e. fastq.tar) to the data/raw directory on the AWS instance.
Working in the terminal on AWS
Many mothur analyses can take a while to run (days?). With your analysis
running on AWS if you lose connectivity (e.g. you close your laptop,
power outage, wifi dies, etc) then your analysis will die with it. A
cool little program that you can run is screen. Once you log into the
AWS instance type screen at the prompt. You can then enter your mothur
commands. Once you have everything running, you can then hit
Control-A+D (i.e. press control, a, and d at the same time). This will
bring you out of that window and put you in your AWS terminal. Don’t
worry, mothur is still chugging along. If you want to see how things are
doing, you can enter screen -r to go back to the mothur prompt. It’s
important to realize that you can’t do this if you haven’t run
screen before running mothur. If you use the screen command, you
can log out of the terminal and disconnect from the internet and the
commands will keep on trucking. Once your commands stop running, you can
either enter more commands or you can quit mothur and type exit from
the $ prompt and leave the screen command.
Quitting
As pointed out above, you are paying by the minute for the processors
that you use. Needless to say, you don’t want to have an instance
sitting idly if it isn’t doing anything. Once you exit out of the
shell and leave the AWS environment, you need to stop the instance in
your AWS console. Return to your EC2
console.
1. Identify your instance (remember we named it mothur above) and make sure the box to the left of the tag is filled in with blue.
2. Then click on the “Actions” button along the top of the console.
3. Go Instance State -> Stop and click the blue button “Yes, Stop”. You will see the “Instance State” change to “stoping” and then “stopped”. This is a safe state to leave your instance without getting charged for processing time.
4. If you repeat the previous step, but click “Start”, it will restart the instance, albeit with a different DNS address. All of the files you created previously should still be in the directories.
5. Finally, if you instead click “Terminate”, it will shut down the instance. At this point, all of your work will be deleted and you will have to go back to the beginning of this tutorial to restart an instance.
Large chunks of this were inspired by the amazing C. Titus Brown and the materials generated for the EDAMAME workshop.